Creating the Fax Repository Folder
To create a fax folder, follow these steps:
| 1. | Log onto a network workstation and open Windows Explorer. |
| 2. | Browse to the hard drive on which you plan to create the Fax Repository folder. |
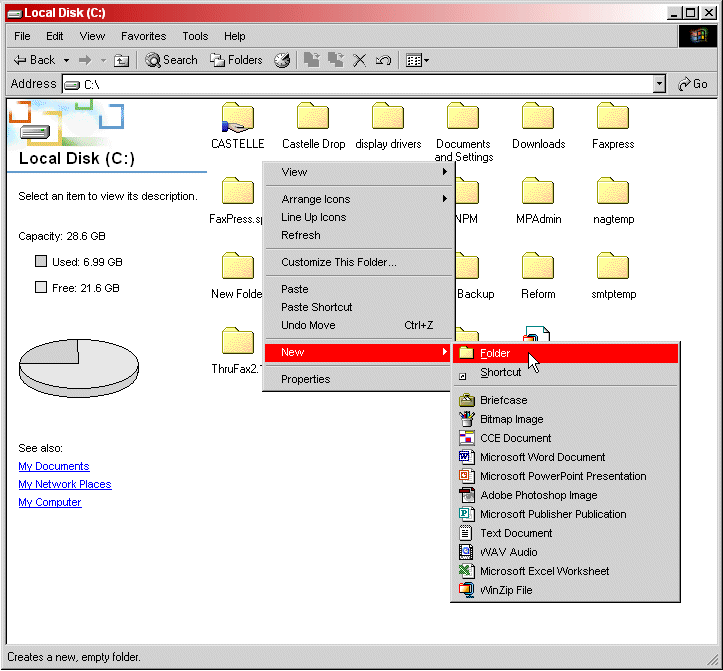
| 3. | Right-click on a blank space in the window displaying the contents of your chosen hard drive, and select New>Folder, as shown below. |
| 4. | Give the folder a name that associates it with the corresponding Xerox system, such as XeroxDrop1. If you have several Xerox systems, create repository folders for each. |
| 5. | Right-click on the new fax repository folder and select the Properties option. |
| 6. | Click the Sharing tab. |
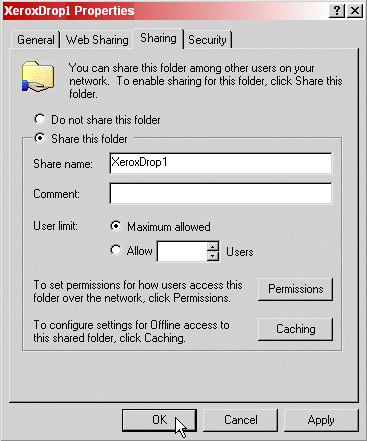
| 7. | Click the radio button for Share this folder, and enter a Share name that will identify it with this folder, such as XeroxDrop1. |
| 8. | Click OK to confirm these settings. |
| 9. | Repeat this procedure for each Xerox system you’ll be using with the FaxPress Premier, creating a unique fax repository folder for each system. |
Setting up the Fax Server Kit on Your Xerox System
FaxPress Premier and Xerox integration requires the Xerox system to be assigned a static IP address. Assign a static IP address to the Xerox system, then take the following steps to configure the Xerox system’s Fax Server Kit for operation with the FaxPress Premier:
| 1. | Open your Web browser on a workstation connected to the local network. |
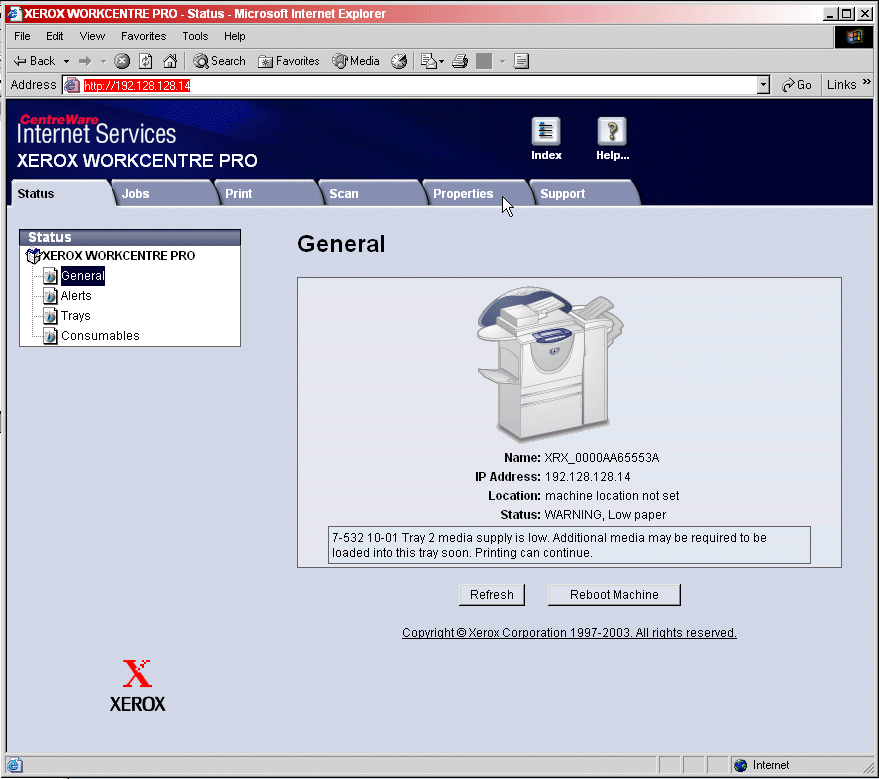
| 2. | Type the Xerox system’s static IP address in the browser’s address field, http://192.128.128.14 in this example. When you press enter, a screen similar to the one below will appear. |
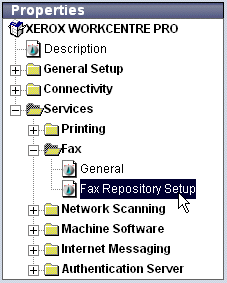
| 3. | Click on the Properties tab and expand the Properties tree. |
| 4. | Expand the Services folder, then the Fax folder. |
| 5. | Select the Fax Repository Setup. |
| 6. | In the Fax Repository Setup window, select SMB (the Windows share option) from the Protocol pull-down menu. |
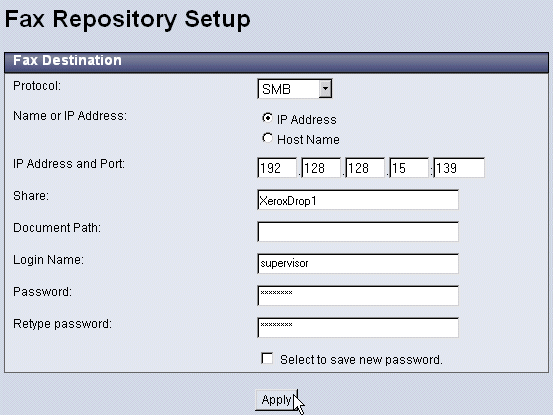
Click the IP Address radio button, then specify the IP address of the workstation on which you set up the fax repository in Creating the Fax Repository Folder.
In the Share field, enter the Share name of the fax repository folder you created in Creating the Fax Repository Folder. XeroxDrop1 is used in the example above.
Leave the Document Path field blank.
Enter the Login Name and Password of a user account on the workstation or server where the repository folder is located (typically, the FaxPress Xerox Interface workstation). Castelle recommends that you use the workstation’s local administrator account.
| 7. | Click Apply. |
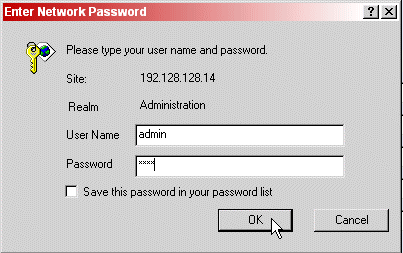
| 8. | The Enter Network Password window will display the User Name and Password of the account required for the Xerox system. By default, the User Name is admin and the password is 1111. Leave these fields at their default settings and click OK. |
After you have created and configured the fax repository, and configured the FaxPress Premier Xerox Interface, faxes sent from the configured Xerox system will automatically be routed to the fax repository folder. Each time you send a fax from the Xerox system, a ****.XSM folder will appear in the repository folder. The **** will be a number starting with 0001.XSM and will increment as more faxes are sent.
|
FaxPress Premier WebHelp
Last Updated: 11/1/2007
E-mail this page |
Castelle 855 Jarvis Drive, Suite 100 Morgan Hill, CA 95037 Toll-free 800.289.7555 Tel 408.852.8000 Fax 408.852.8100 |